This is a sponsored conversation inspired by the Canon PIXMA MG7120. All thoughts and opinions are genuine and 100% my own. For more information on the new Canon Wireless Inkjet Photo All-In-One printers, visit usa.canon.com/pps.
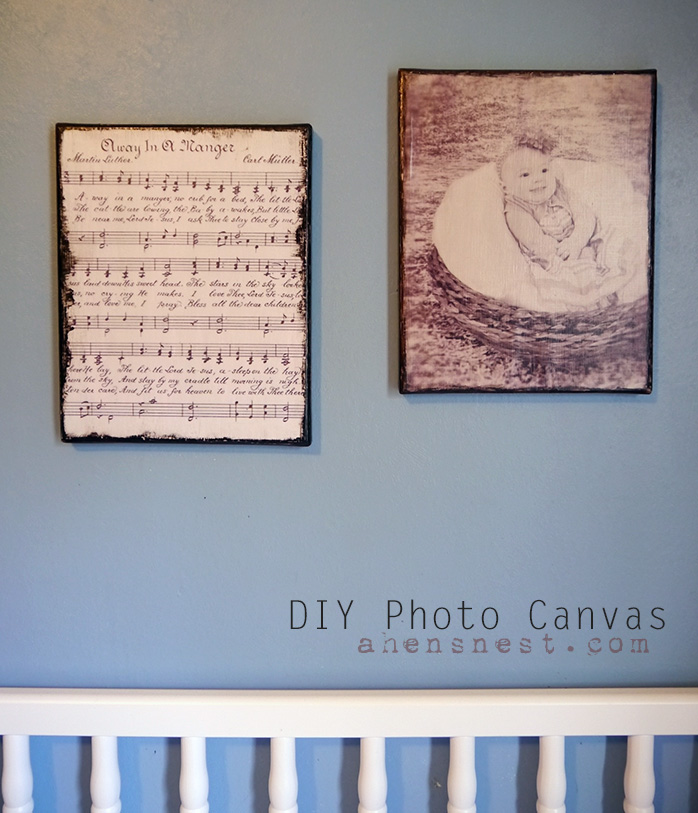
‘Tis the season for gift giving and receiving! There truly is nothing as special as a gift someone has made just for you. I am not super crafty but I do enjoy exploring new craft techniques, especially when the finished product is for a loved one. I’ve been using my Canon PIXMA MG7120 Wireless Inkjet Photo All-In-One printer as a crafting tool to print everything from recipe cards to photo prints these past few weeks so I was inspired to use it again to print the images for a project I have wanted to try — making a DIY Printed Photo Canvas!
I have always wanted to decoupage so I decided try my hand at making this homemade Photo Canvas project for my son. His little daughter turned one year old on November 20th — she is growing so fast — and I just knew a DIY photo canvas with her photo on it would be the perfect gift for him. Since two is always better than one, I paired the baby photo canvas with a sheet music canvas. When my son was a baby, I used to sing “Away In a Manger” over and over as a lullaby to put him to sleep at night. So, I thought this would be a sweet reminder of his childhood.
The decoupage photo canvas ended up being a fun to make and inexpensive gift. It wasn’t as hard as I thought it would be — if I can do it, anyone can!
How to make a DIY Photo Canvas with a Printed Photo
You will need a few supplies to get started. They are easily found at your local big box or art supply store:
- Matte Mod Podge
- White, black & brown acrylic paints
- Assorted brushes and sponge brushes
- Matte Acrylic Spray Sealer
- 2 – 8” x 10” Pre-stretched Canvases
- Scrapbook paper or printed decorative paper pattern
- 8×10 Photo Print – a light photo works best when using an inkjet printer
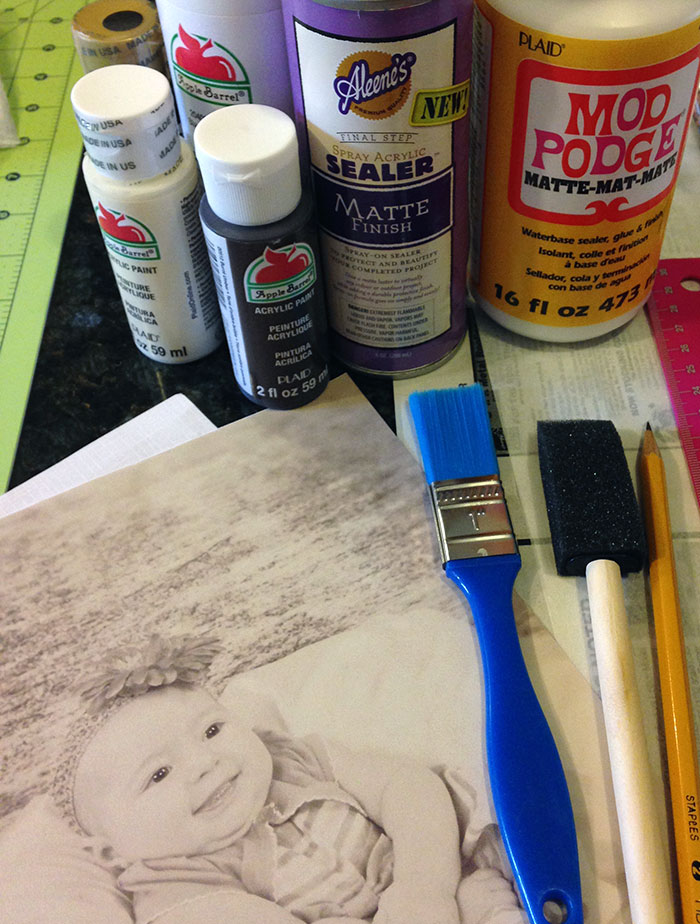
Using my PIXMA MG7120’s touch screen, I scanned a photo of my granddaughter into my computer. Then, to make the photo look older, I used a graphics program to adjust the color to vintage-look sepia. I set the printer to print the photo as a borderless photo on a sheet of 8 ½” x 11 Linen-look business paper that I found at the store. This paper has a nice texture to it and looks neat on the canvas.
The old sheet music for the second canvas was a nice find from the VintageFeedsack blog – I printed it out onto regular printer paper. Both of the images came out of the printer looking great — I was really pleased with how well the scanned, enlarged and edited photo turned out.
For the best results using Mod Podge with a printed photo, let the ink dry overnight before spraying each paper with two light coats of the matte acrylic spray sealer (definitely do this outside, or in a well-ventilated area, as you shouldn’t breathe the fumes!) I let the papers dry overnight again — just to be sure they wouldn’t bleed when I started to decoupage. Some crafters say you can skip this whole sealing step, but I haven’t tried it without doing so yet. I gave the canvases a coat of white acrylic paint and let them dry overnight as well.
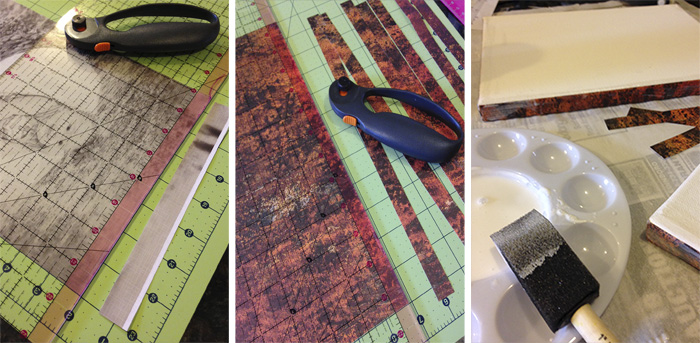
Before you start to decoupage the printed photos onto your canvas, I recommend covering your work surface with a layer of newspaper and a sheet of waxed paper. To decorate the canvas edges, cut strips of your decorative paper slightly narrower than the edges.
Use a sponge brush to paint a coat of Mod Podge onto the canvas edge then stick a strip down, smoothing out as you go along — pay special attention to the edges of the paper. Brush a light coat of Mod Podge over the top of the strip and repeat on all sides of both canvases. Mod Podge dries quickly so by the time you’re done with the second canvas, you can start on the top of the first.
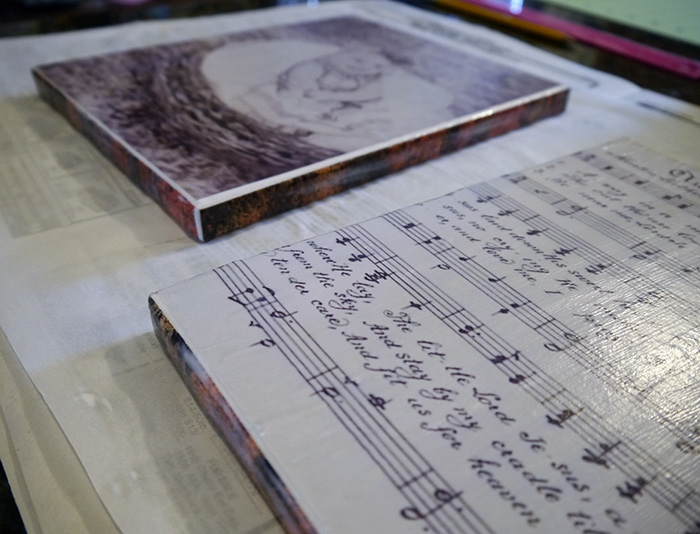
Now here is the tricky part — the top! Since I knew I would be painting and blending the edges of my canvas, I cut my photos so they were slightly smaller than the top of each canvas.
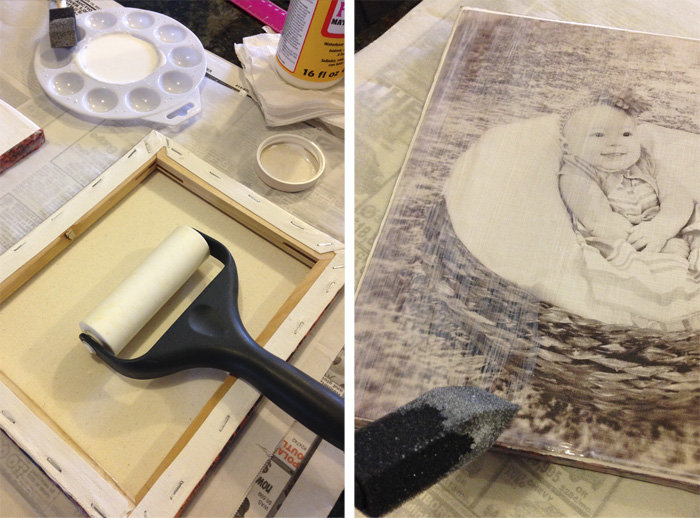
Now, working quickly, brush a thin layer of Mod Podge over the top of the canvas. Lay your prepared photo face down on your work surface. Center the canvas over the photo and carefully press down. Gently rub all over the back of the canvas before flipping to check for bubbles. I ended up using my pie crust roller to smooth the back out some more — it worked well!
Once you’re happy with how the tops look — let them dry for 15-20 minutes before brushing a thin layer of Mod Podge over the whole canvas.
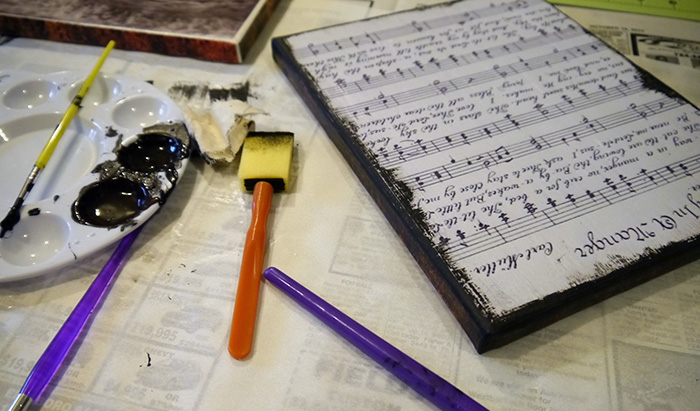
After another 20 minute dry time, mix the brown and black acrylic paint to your desired shade and use a wide round brush to paint the sides. While it was still tacky, I went over this paint coat with a stiff dry brush to give the edges a weathered look.
To make the top edges look aged, I used a small brush to paint a line down each side, then used a brush and sponge to drag the paint and add scuffs. After drying for another 15-20 minutes, I used 400 grit sandpaper to lightly distress the paint and edges of the canvas. Just have fun with it!
When you are pleased with your canvas, go over the whole piece very lightly with the 400 grit sandpaper. Wipe off any sanding debris and give the whole canvas one final coat of Mod Podge. You can stop here or let dry overnight and then spray with a light coat or two of the matte acrylic spray. The canvases are ready to hang on the wall or wrap up as a gift! I am thinking about adding a ribbon to the back of these canvases as a hanger, I haven’t decided yet — What do you think?
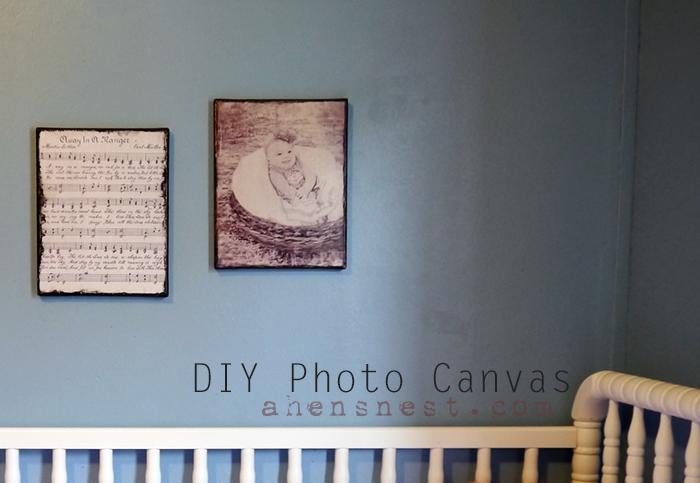
After finishing this project, I think I may have created a monster because I cannot wait to do it again! I have realized that pretty much every photo or paper in the house is easy to scan with my PIXMA MG7120 — which means the subjects for a photo canvas are endless! They are so easy and fun to make. And using a photo makes this project a wonderful way to create a keepsake or preserve a memory!
What would you print to make your own DIY printed photo canvas?





That looks like a lot of work (at least for me lol), but they came out amazing. They seriously look awesome.
This is such a great idea! While it’s too late to do for Christmas gifts for my daughters, I can definitely see doing these as Mother’s Day gifts! Thanks so much! I have it bookmarked for later!
This decoupage looks really great and it creates an atmosphere of special pleasant memories. As a pasrt of décor it also looks very cute because it makes the room cozy.
I think it turns out amazing, I really like it. And it would be a fabulous gift for someone, no doubt about it.
They look great. I think I would like to try this with a family photo. I love how you did the edges, you did a great job!
You did a beautiful job.
This turned out beautifully! I’d love to do some sheet music and hang it over the piano.